The Mac M2 chip is fast, power-efficient, and built for sustained workloads — which makes it one of the best personal machines for running an AI agent like OpenClaw.
This guide takes you from a fresh Mac M2 to a fully working agent. No prior experience needed. If you prefer cloud hosting over local setup, Ampere.sh lets you skip all of this and get started right away.
Why Mac M2 is Great for OpenClaw
Most personal computers were not built for running background AI services. Mac M2 is different. Here is what makes it a solid choice:
Mac M2 Requirements for OpenClaw
Check these before starting so the install goes smoothly:
- macOS version — Ventura 13.0 or newer. Monterey 12.0 also works but Ventura is recommended.
- RAM — 8 GB is the minimum. 16 GB gives you room for multiple agents or heavier models.
- Storage — OpenClaw uses under 200 MB. Make sure you have at least 1 GB free.
- API key — You need one from Anthropic, OpenAI, Google, or another supported provider before you start.
- Terminal — Open the built-in Terminal app (Applications → Utilities → Terminal) or use iTerm2.
Installing OpenClaw on Mac M2
Step 1 — Run the Installer
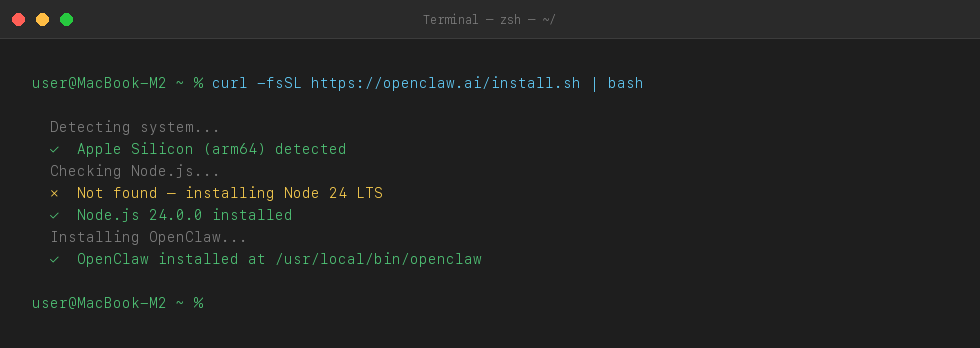
Open Terminal and paste this command. It automatically installs OpenClaw along with the right version of Node.js for your M2 chip.
curl -fsSL https://openclaw.ai/install.sh | bashThe script detects Apple Silicon and installs the native arm64 build. No Rosetta, no compatibility mode.
Step 2 — Run the Setup Command
Once the install finishes, run this command in Terminal. Do not remove the --install-daemon part — it makes OpenClaw start automatically every time your Mac boots up.
openclaw onboard --install-daemonStep 3 — Accept the Disclaimer
The setup wizard will show a short disclaimer first. Read it and press Enter to continue.

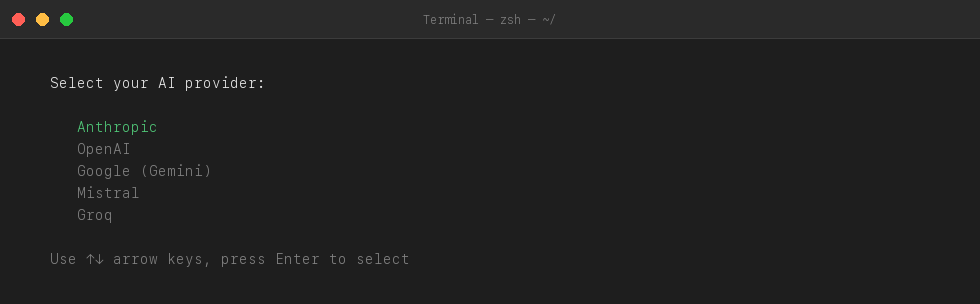
Step 4 — Choose Your AI Provider
You will see a list of AI providers. Use the arrow keys to pick one — for example Anthropic, OpenAI, or Google — then press Enter.
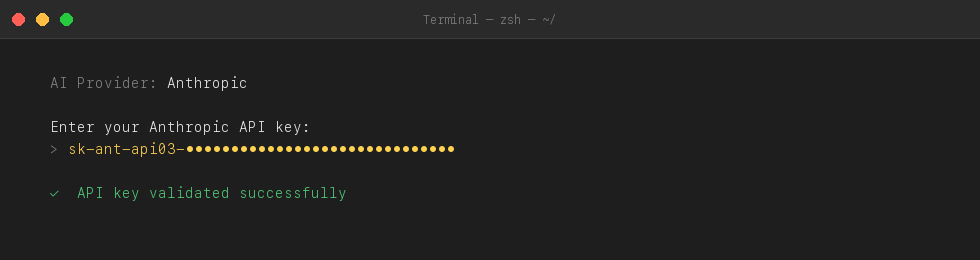
Step 5 — Paste Your API Key
Copy your API key from your provider dashboard and paste it when asked. The key will not be visible as you type — that is normal.
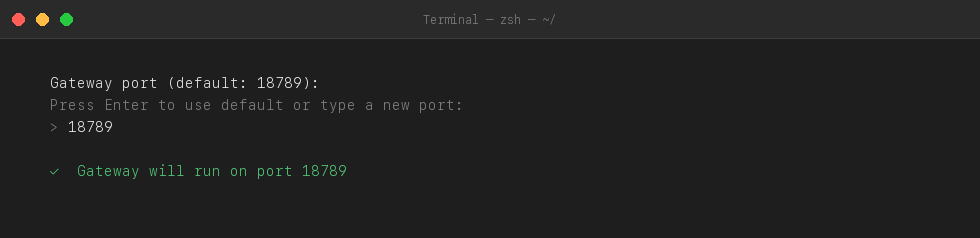
Step 6 — Set the Gateway Port
Press Enter to keep the default port 18789. You do not need to change this unless another app is already using that port.
Step 7 — Connect a Messaging App
Choose which app you want to use to chat with your agent — Telegram, Discord, WhatsApp, or others. Follow the steps shown on screen to link your account.
Step 8 — Verify the Agent is Live
Run this to confirm everything is working:
openclaw gateway statusYou should see the gateway running with a PID and port number. Open the web dashboard to manage your agent from a browser:
openclaw dashboard
# Or open: http://127.0.0.1:18789/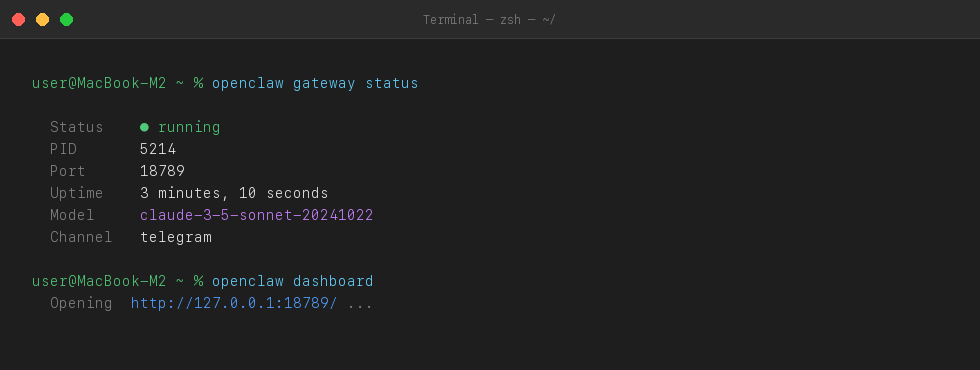
Keeping Your Agent Online 24/7
The daemon flag keeps OpenClaw running in the background, but macOS can still put your Mac to sleep and take the agent offline. Fix this in one place:
- Open System Settings
- Go to Battery → Options
- Turn on Prevent automatic sleeping when display is off
On a MacBook M2, keep it plugged in when you want the agent running overnight. On a Mac Mini M2, this setting is all you need — the machine is already always on.
Fixes for Common Issues
Command not found after install
Your shell cannot find the openclaw command even though the install finished. This happens because the PATH was not updated for the current session.
Reload your shell profile to pick up the new PATH.
source ~/.zprofile
# Then try:
openclaw --version
Agent goes offline when Mac sleeps
macOS sleeps the machine when idle, which stops all background processes including the OpenClaw gateway.
Go to System Settings → Battery → Options and turn on Prevent automatic sleeping when display is off.
# Confirm gateway is still running after waking Mac:
openclaw gateway status
# If not running, start it:
openclaw gateway start
API key rejected
The AI provider is returning an authentication error. The key may be wrong, expired, or from a different account.
Copy the key again from your provider dashboard and re-run onboarding.
openclaw onboard --install-daemonSomething else is broken
Not sure where the problem is — could be config, Node version, network, or something else.
Run the built-in diagnostic tool. It scans everything and tells you exactly what is wrong.
openclaw doctorMac M2 Local Setup vs Ampere.sh
Running OpenClaw on your own Mac M2 gives you full control. Running it on Ampere.sh means you never have to think about uptime again. Here is the tradeoff:
| Feature | Mac M2 (Local) | Ampere.sh |
|---|---|---|
| Time to get started | 15–20 minutes | 60 seconds |
| Agent offline when Mac sleeps | ❌ Yes | ✅ Never |
| Setup required | Terminal + config | None |
| Agent uptime | Depends on your Mac | ✅ 24/7 guaranteed |
| Maintenance | You manage updates | Fully managed |
| Cost to start | API key only | ✅ Free credits |
Your Mac M2 is Powerful. Your Agent Should Not Depend on It.
Running OpenClaw locally on Mac M2 works well — until your Mac restarts, the lid closes, or the power goes out. When that happens, your agent goes silent.
Ampere.sh keeps your agent running on dedicated cloud servers — completely separate from your Mac. No config files, no sleep settings, no Terminal required:
- Your agent answers messages even when your Mac is shut down
- Nothing to install or maintain — updates happen automatically
- Start for free, no credit card required
- Works alongside your local setup or as a full replacement
Frequently Asked Questions
Does OpenClaw run natively on Mac M2?
Is Mac M2 better than M1 for running OpenClaw?
Does OpenClaw work on M2 Pro and M2 Max?
Will my agent stop working if I close the MacBook lid?
How do I update OpenClaw on Mac M2?
Can I run multiple OpenClaw agents on M2?
What is the config file location on Mac M2?
Run OpenClaw Without Local Maintenance
If you want OpenClaw always online without sleep settings, restarts, or local maintenance, run it on Ampere.sh and keep your agent available 24/7.
Start your setup